 Save
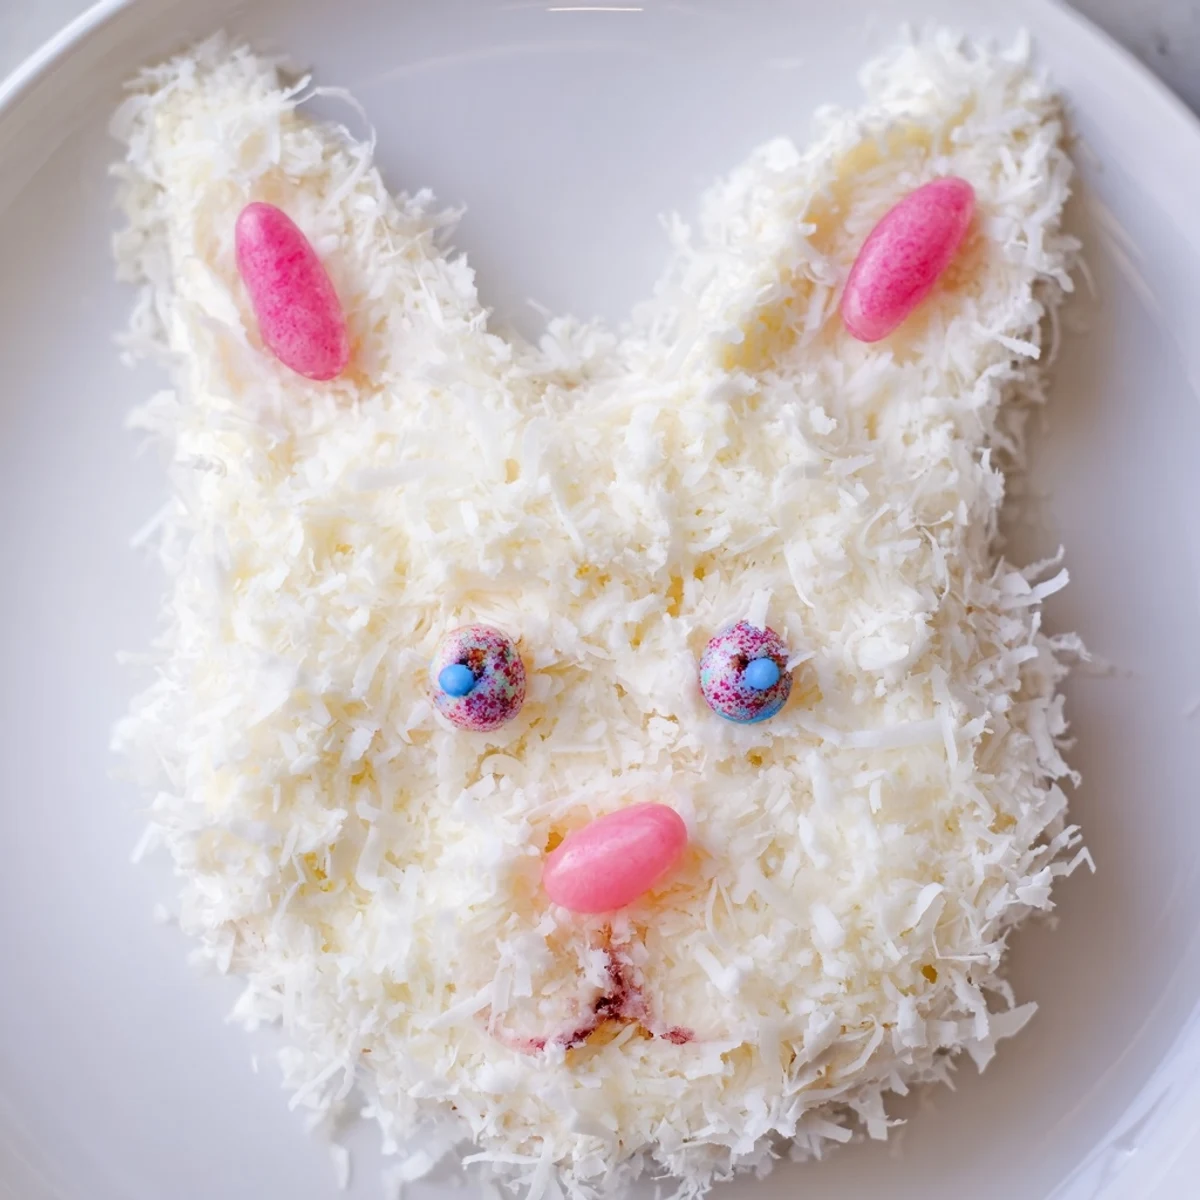
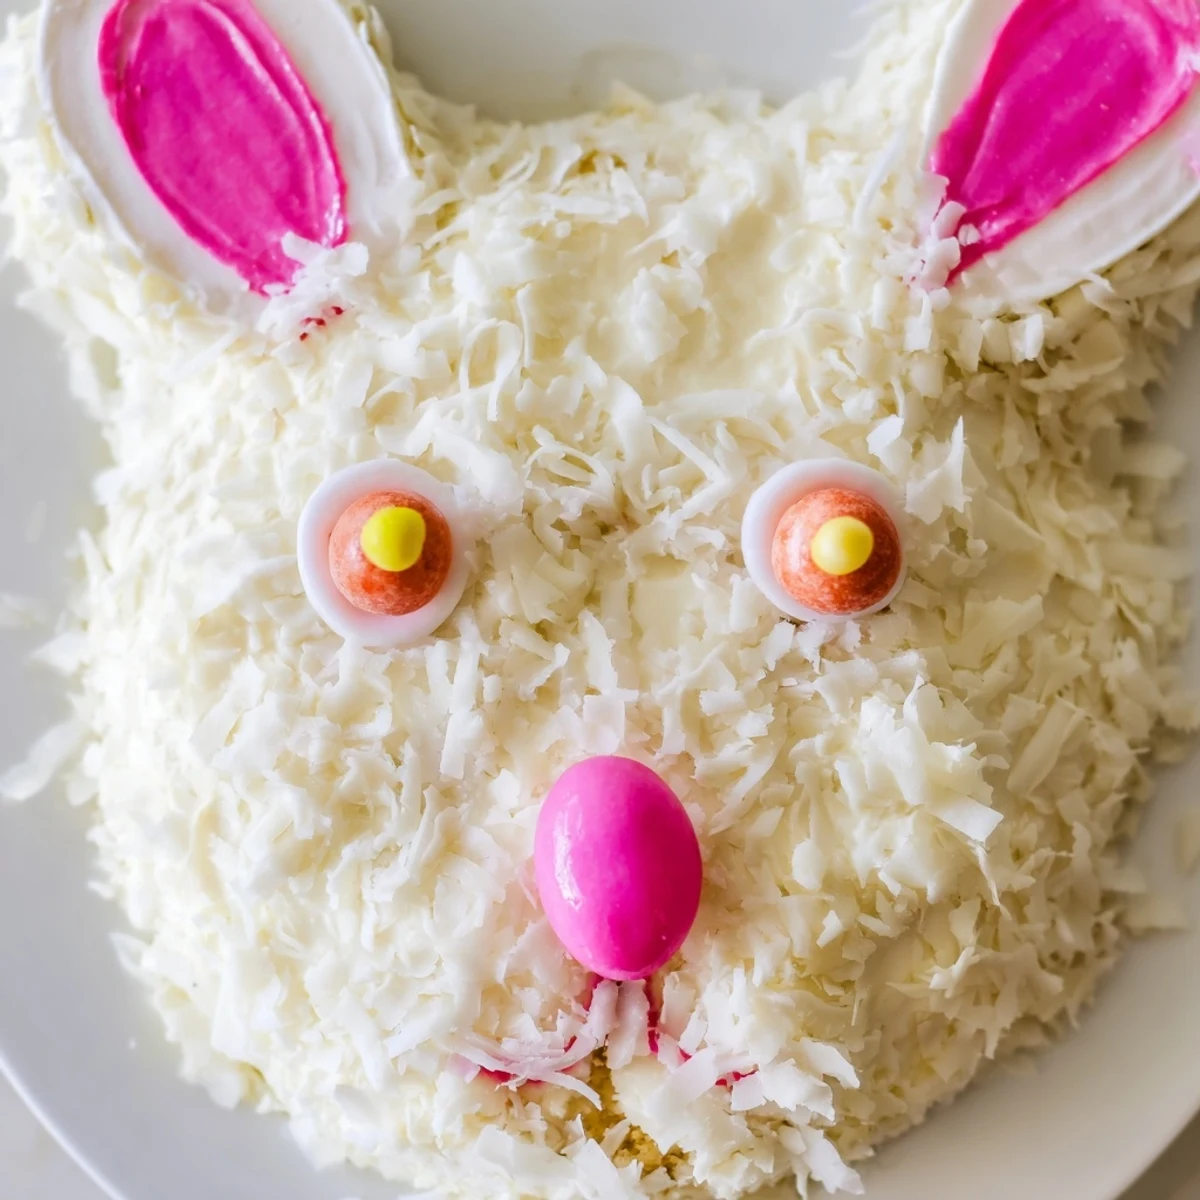
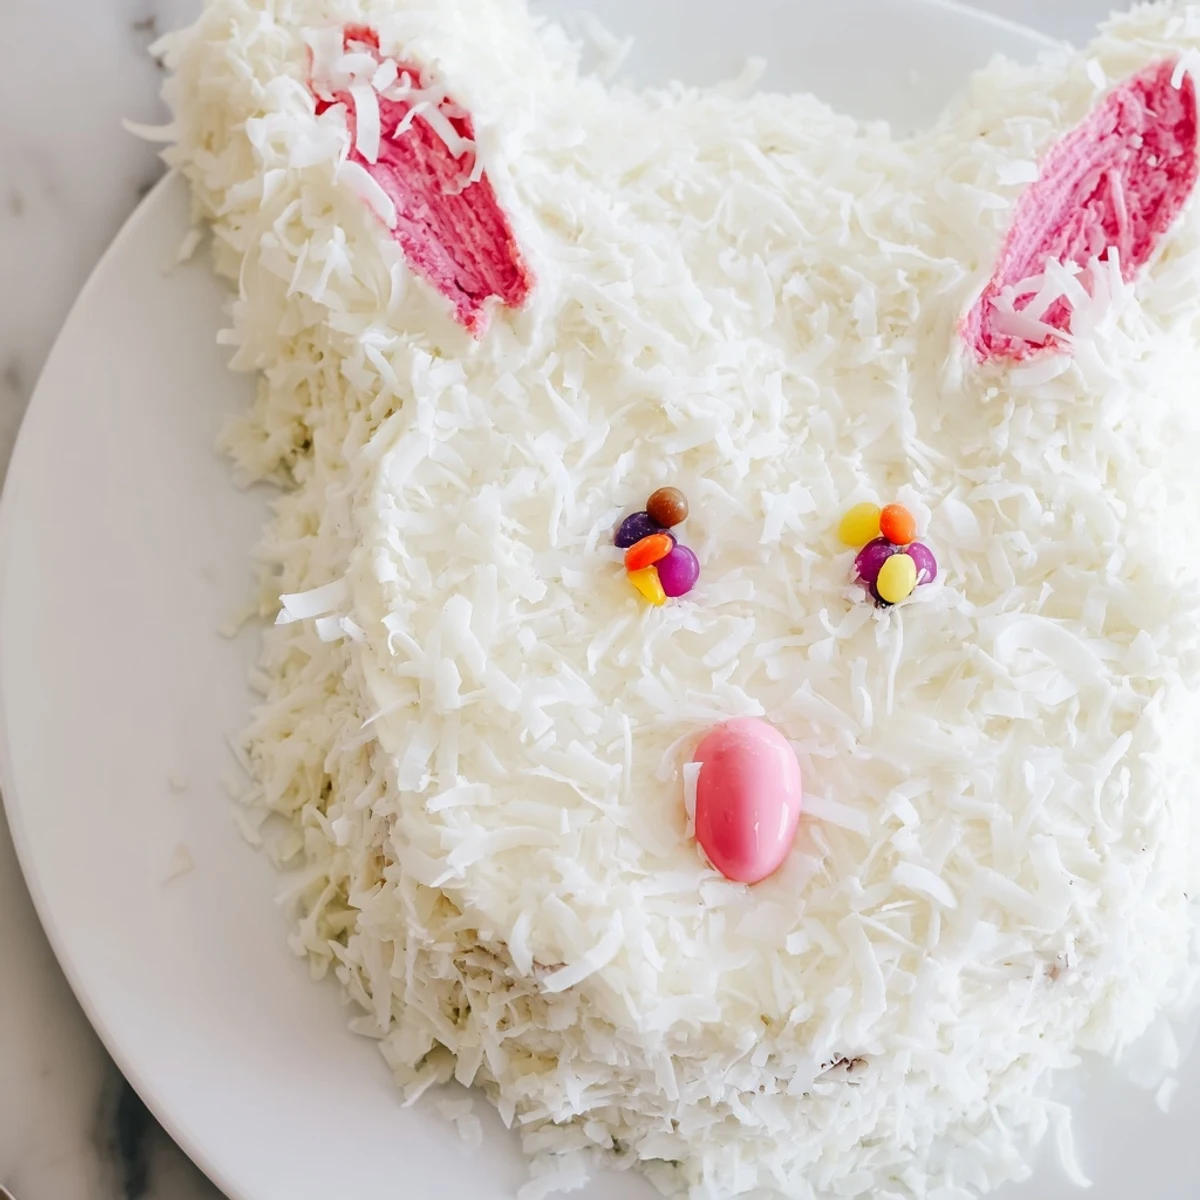
Save This charming bunny-shaped dessert combines moist vanilla cake layers with silky buttercream frosting. The cake is assembled using two round cakes cut and arranged to form an adorable bunny face with ears and bow tie.
Coated in shredded coconut for a fluffy fur effect and decorated with colorful candies, this centerpiece is perfect for Easter or spring celebrations. Simple techniques make it approachable for beginning bakers.
The kitchen smelled like vanilla and sugar the morning I decided to tackle my first bunny cake, armed with nothing but enthusiasm and a vague memory of my grandmother making one decades ago. There is something wonderfully silly about assembling cake pieces into a face that makes everyone smile before they even take a bite. Spring celebrations deserve this kind of playful effort.
My niece still talks about the year I accidentally gave the bunny lopsided ears and we decided he looked like he was mid hop.
Ingredients
- All purpose flour: The foundation of a tender crumb, measured by spooning into the cup rather than scooping.
- Baking powder and baking soda: This dual lift system gives the cake its light texture.
- Salt: Just enough to wake up all the sweet flavors.
- Granulated sugar: Creates structure and moisture while sweetening.
- Unsalted butter: Bring it to room temperature for the smoothest batter.
- Eggs: Large eggs bind everything together and add richness.
- Whole milk: The fat content keeps this cake moist for days.
- Vanilla extract: Do not skimp here because good vanilla makes the flavor sing.
- Powdered sugar: Sift it to avoid lumps in your silky frosting.
- Shredded coconut: Pressed into the frosting to create fluffy bunny fur.
- Pink food coloring: A tiny drop transforms plain coconut into inner ears.
- Jelly beans: Pick your favorite colors for the nose and eyes.
- Fondant or marshmallows: These become the distinctive bunny ears.
Instructions
- Prep your pans:
- Heat the oven to 350°F and generously grease two 8 inch round pans with butter and a dusting of flour.
- Mix dry ingredients:
- Whisk flour, baking powder, baking soda, and salt in a bowl until evenly combined.
- Cream butter and sugar:
- Beat softened butter with sugar until the mixture turns pale and fluffy, about three minutes.
- Add eggs and vanilla:
- Drop in eggs one at a time, beating well after each, then pour in the vanilla.
- Combine wet and dry:
- Alternate adding flour mixture and milk, starting and ending with flour, mixing just until incorporated.
- Bake the cakes:
- Divide batter between pans and bake 22 to 25 minutes until a toothpick comes out clean.
- Cool completely:
- Let cakes rest in pans for ten minutes, then turn onto wire racks and wait patiently.
- Make the frosting:
- Beat butter smooth, then gradually add powdered sugar, vanilla, salt, and milk until spreadable.
- Shape the bunny:
- Keep one round whole for the face and cut the other into two ear ovals and a bow tie from the center.
- Arrange on platter:
- Place the face, ears, and bow tie on your serving tray in the classic bunny shape.
- Apply crumb coat:
- Spread a thin frosting layer over everything and chill for twenty minutes to lock in crumbs.
- Frost and add fur:
- Frost generously and press coconut all over the surface for that fluffy bunny texture.
- Color the inner ears:
- Mix a drop of pink coloring into a small amount of coconut and press onto the ear centers.
- Add the face:
- Position your candies for eyes and nose, add fondant ears, and use licorice for whiskers if desired.
 Save
Save One year I made this with chocolate cake instead and called it a chocolate bunny, which became its own tradition.
What If Something Goes Wrong
Cake stuck to the pan happens to everyone at some point, and you can patch pieces together with frosting as glue.
Making It Your Own
Try lemon cake with lemon curd between the layers for a bright spring variation that tastes as cheerful as it looks.
Getting Ahead
Bake the cakes a day ahead and wrap them tightly in plastic while they are still slightly warm to lock in moisture.
- Frosting can be made three days ahead and stored in the fridge.
- Bring all chilled components to room temperature before assembling.
- Have all your decorations ready before you start frosting.
 Save
Save This cake has a way of turning ordinary gatherings into celebrations worth remembering.
Recipe FAQs
- → How do I shape a round cake into a bunny?
-
Leave one round cake whole for the face. Cut the second round in half for ears, then cut a small triangle from the remaining curve to create a bow tie piece. Arrange all pieces on a large serving tray.
- → Can I make this cake ahead of time?
-
Yes, bake the cake layers up to two days ahead and store covered at room temperature. Frost and decorate the day of serving for best results and fresh appearance.
- → What can I use instead of coconut for decoration?
-
White frosting alone works well, or try white chocolate shavings, mini marshmallows, or even piped buttercream rosettes to create the bunny fur texture.
- → How should I store the finished cake?
-
Store covered at room temperature for up to two days. For longer storage, refrigerate up to four days, though bring to room temperature before serving for best flavor.
- → Can I use boxed cake mix instead?
-
Absolutely. Two boxes of vanilla or white cake mix will work perfectly. Follow package directions and use the same pan sizes and baking temperatures.
- → What candies work best for decorating?
-
Jelly beans make excellent noses and eyes. Licorice strips work for whiskers. Pink and white fondant or large marshmallows cut and shaped create perfect ears.