 Save
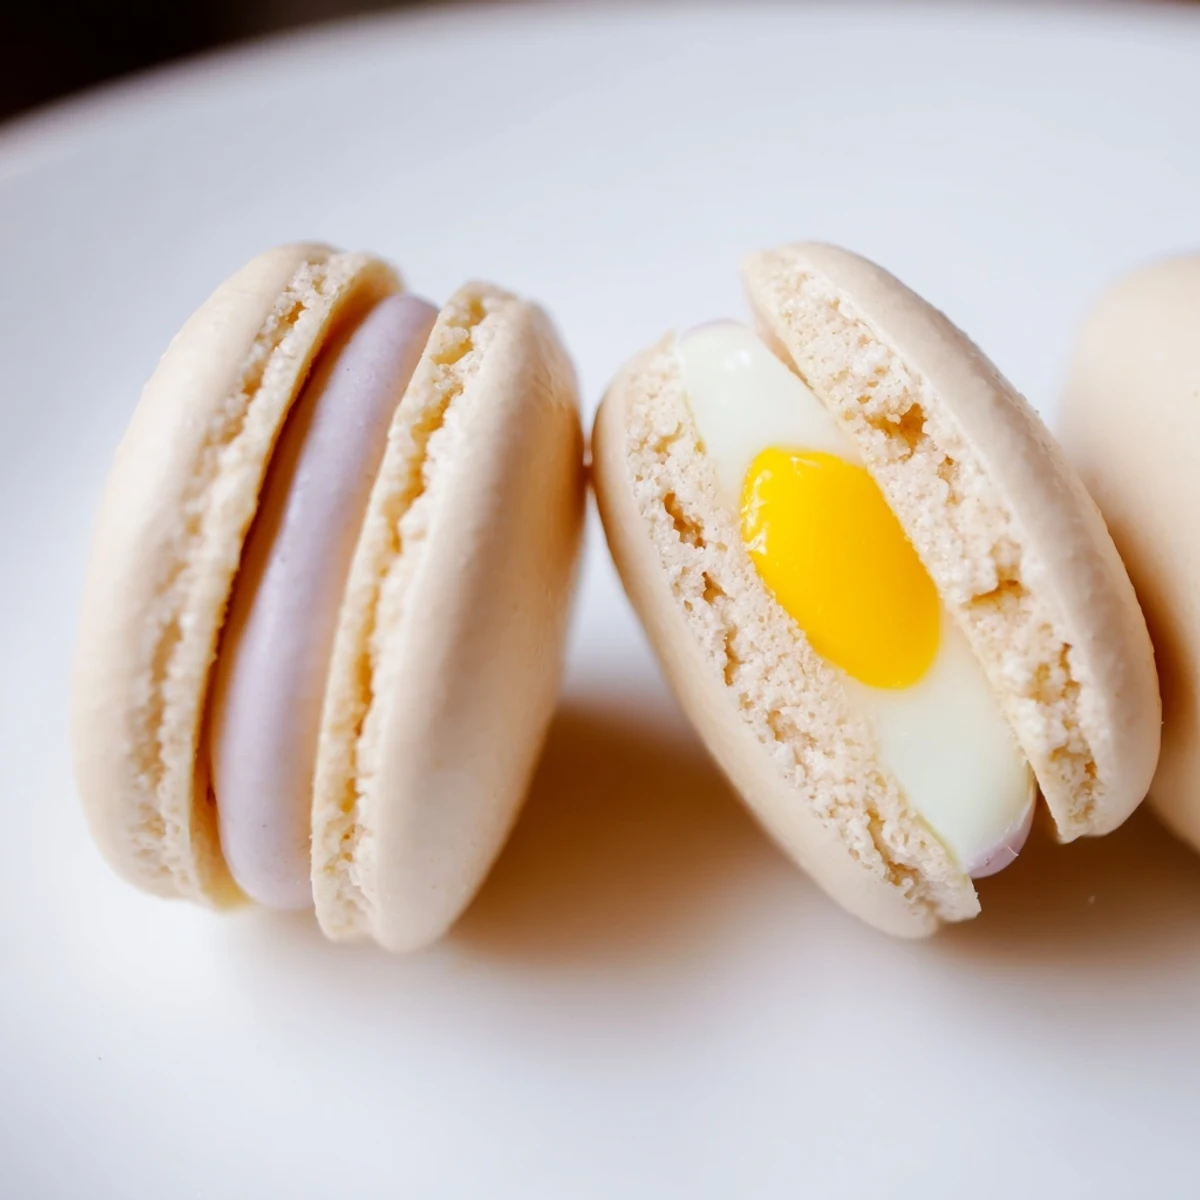
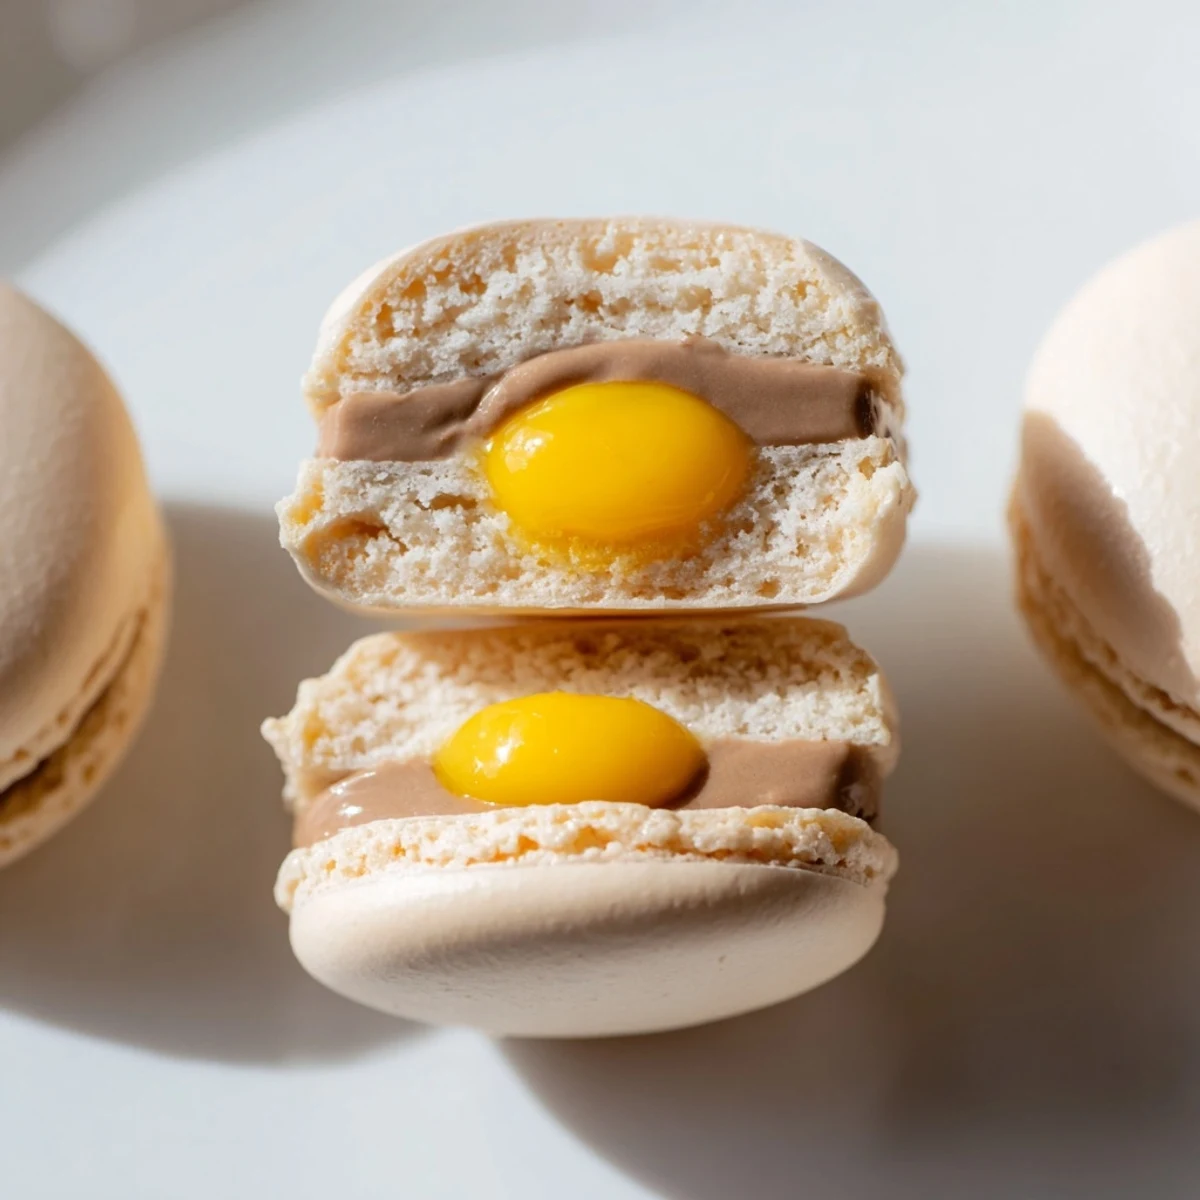
Save These delicate French macarons feature crisp almond meringue shells filled with a luscious two-toned chocolate ganache inspired by Cadbury Creme Eggs. The creamy milk chocolate filling gets a signature yellow center, mimicking the beloved Easter candy. Perfect for spring celebrations, these elegant confections combine traditional French patisserie technique with nostalgic childhood flavors.
The process involves creating a stable meringue, carefully folding in almond flour, and piping perfect rounds that rest before baking. The filling comes together with heated cream poured over quality milk chocolate, then enriched with butter and golden silk for glossy results.
The first time I attempted macarons, I ended up with flat, crispy cookies that looked nothing like the elegant French confections I had imagined. It was a rainy Sunday afternoon, and I had decided to challenge myself with something notoriously finicky. My kitchen was covered in almond flour dust, and I may have texted my best friend a dramatic photo of my failed shells. But something about that process, the rhythmic folding and the way the batter transformed, kept me coming back until finally those perfect little feet appeared.
Last spring, I made these for my familys Easter gathering and watched my dads face light up when he bit into the first one. He immediately recognized that familiar Cadbury flavor but seemed genuinely surprised by how sophisticated it tasted in macaron form. My sister actually grabbed three before dessert was even officially announced, which I took as the highest compliment possible. Now theyre requested for every holiday, not just Easter.
Ingredients
- 100 g almond flour: Sift this thoroughly with your powdered sugar to avoid any lumpy bits in your delicate shells.
- 100 g powdered sugar: This sweetness balances the almond and creates that signature macaron texture.
- 90 g egg whites: Room temperature whites whip up better and create more stable meringue for your shells.
- 90 g granulated sugar: Added gradually, this gives your meringue structure and helps those coveted feet form.
- 1/4 tsp cream of tartar: This stabilizes your egg whites so they hold those stiff peaks longer while you work.
- 100 g milk chocolate: Cadbury Dairy Milk gives you that authentic nostalgic flavor we all love from childhood.
- 50 ml heavy cream: Creates that silky, smooth ganache consistency for the filling.
- 3 tbsp golden syrup: This keeps your filling soft and prevents it from becoming too firm in the refrigerator.
- 50 g unsalted butter: Adds richness and helps the filling hold its shape when piped.
Instructions
- Prepare your workspace:
- Line two baking sheets with parchment paper or silicone mats and fit a pastry bag with a 1/2-inch round tip.
- Sift your dry ingredients:
- Sift together almond flour and powdered sugar into a bowl, then set aside while you prepare the meringue.
- Whip the meringue:
- In a clean, dry bowl, whisk egg whites and cream of tartar until soft peaks form, then gradually add granulated sugar while whisking to stiff, glossy peaks.
- Master the macaronage:
- Gently fold the almond flour mixture into your meringue in three additions, mixing only until the batter flows in thick ribbons off your spatula.
- Pipe perfect rounds:
- Transfer batter to your pastry bag and pipe 32 rounds about 1.5 inches each onto prepared sheets, then tap trays firmly to release any trapped air bubbles.
- Rest the shells:
- Let shells sit at room temperature for 30 to 60 minutes until the surfaces are completely dry to touch and a skin has formed.
- Bake to perfection:
- Preheat oven to 150°C (300°F) and bake for 13 to 15 minutes, rotating halfway through, until shells easily lift from the mat.
- Create the filling:
- Heat heavy cream until just simmering, pour over chocolate and let sit for 2 minutes, then stir smooth with golden syrup and butter until glossy.
- Add the yolk effect:
- Divide one quarter of the filling and tint with yellow gel coloring, then chill both fillings until thickened enough to pipe.
- Assemble your masterpiece:
- Pipe a ring of chocolate filling on one shell, add a small dollop of yellow filling in the center, then gently sandwich with another shell.
 Save
Save There is something deeply satisfying about biting into one of these and experiencing that familiar Cadbury flavor in such a refined, elegant form. My friend Sarah actually admitted she ate four in one sitting during our Easter brunch, claiming she was just quality control testing. Watching people recognize that nostalgic taste while marveling at how fancy they look is honestly one of my favorite kitchen moments.
Making Them Ahead
The filling can be prepared up to two days in advance and stored in the refrigerator, which actually makes the assembly process much smoother. Just let it come to room temperature before piping, or you may find it too firm to work with. The unfilled shells also freeze beautifully for up to a month if you want to get a head start on holiday prep.
Getting That Perfect Yellow Center
The trick to making your yellow yolk look authentic is using a very small amount of gel coloring, starting with just a tiny bit on a toothpick. I once added too much at once and ended up with an unnaturally neon center that looked more like radioactive waste than egg yolk. Keep your yellow filling portion small compared to the chocolate outer ring for that perfect creme egg proportion we all remember from childhood.
Troubleshooting Common Issues
Hollow shells usually mean your oven temperature was too high or you did not let them rest long enough before baking to form that proper skin. Cracked tops indicate that air bubbles were still trapped in the batter, so tap those pans firmly and let the shells rest until they are dry to the touch. If your macarons do not have feet, your batter might have been over-mixed or your oven ran too cool throughout the baking process.
- Invest in an oven thermometer to ensure accurate temperature.
- Practice your piping technique on a plate first until you get consistent sizes.
- Let assembled macarons mature in the fridge for 24 hours for the best texture and flavor.
 Save
Save These Cadbury Egg macarons have become one of those recipes I am asked to make again and again, and I never mind because the joy they bring people is absolutely worth the effort. Hope they become a beloved tradition in your kitchen too.
Recipe FAQs
- → Why must macaron shells rest before baking?
-
Resting allows the surface to dry completely, forming a thin skin. This skin traps steam during baking, creating the signature ruffled feet and smooth domed tops. Without proper resting, shells may crack or spread unevenly in the oven.
- → Can I use different chocolate for the filling?
-
While Cadbury Dairy Milk provides authentic flavor, any quality milk chocolate works well. Dark chocolate creates a bolder contrast, white chocolate offers sweetness, and semi-sweet balances richness. Choose chocolate with at least 30% cocoa butter for proper ganache texture.
- → How do I know when meringue reaches stiff peaks?
-
Stiff peaks should stand straight up when whisk is lifted, without curling at the tip. The meringue should look glossy and hold firm shape. Rub a small amount between fingers—if it feels gritty, keep whisking until sugar dissolves completely.
- → Why do my macarons crack during baking?
-
Cracking usually indicates insufficient resting time, oven temperature too high, or over-mixed batter. Ensure shells develop dry skin before baking, use an oven thermometer, and stop folding when batter flows in thick ribbons that disappear slowly.
- → How long should macarons mature before serving?
-
Macarons need 24-48 hours in an airtight container for optimal texture. This resting period allows moisture from filling to soften shells slightly, creating that characteristic chewy interior. They improve significantly after the first day.
- → Can I make macarons ahead of time?
-
Shells can be baked 1-2 days ahead and stored at room temperature in an airtight container. Fillings keep refrigerated for up to 5 days. Assemble macarons 1-2 days before serving to maintain texture while allowing flavors to mature properly.