 Save
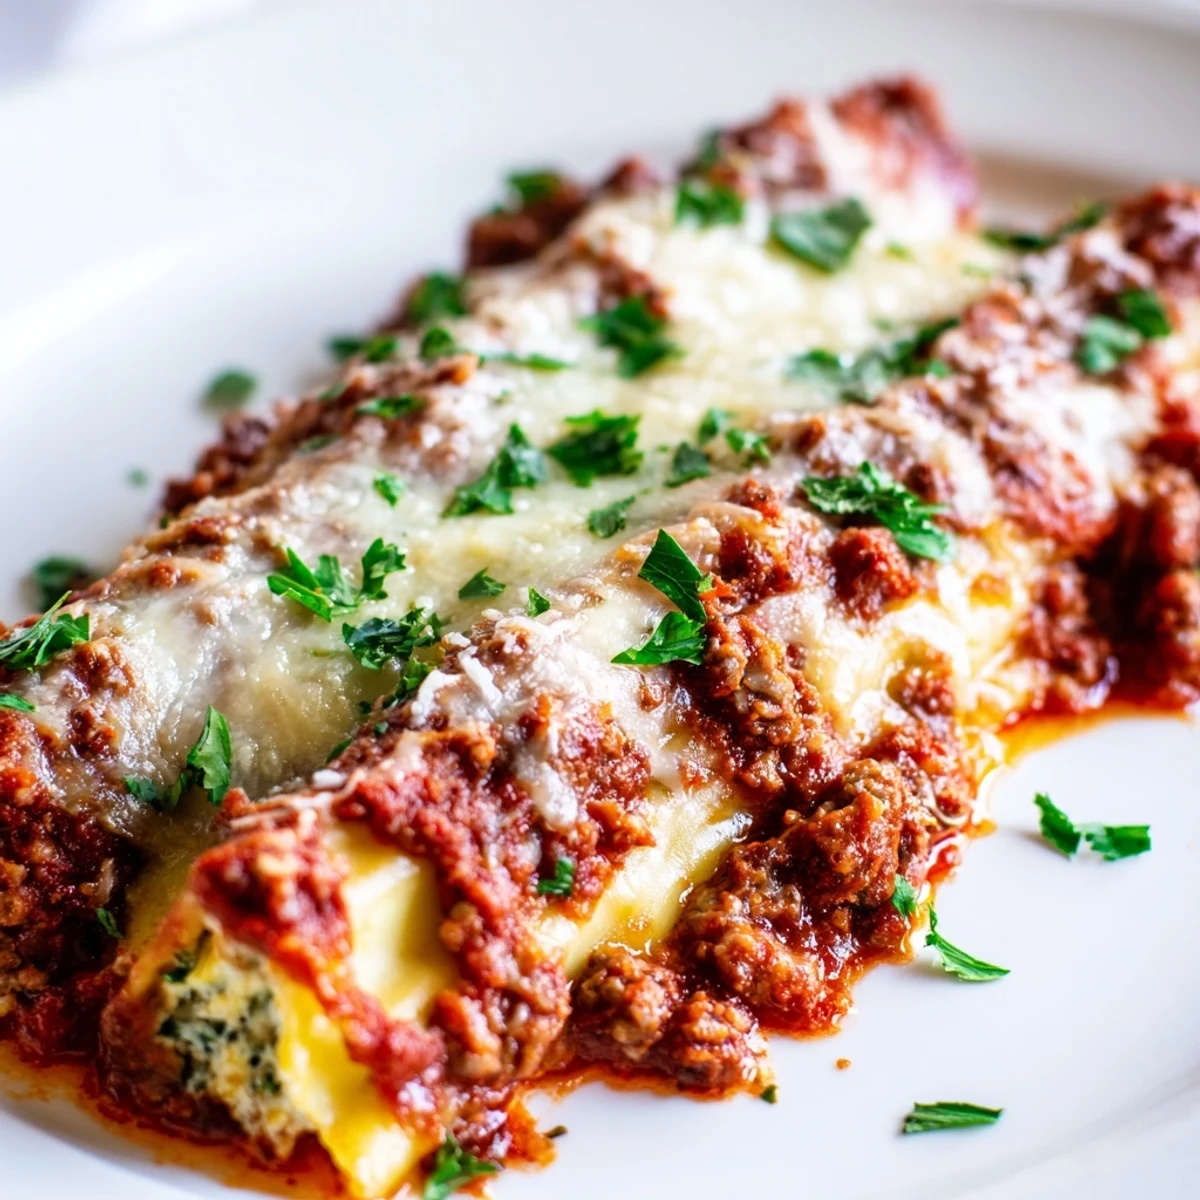
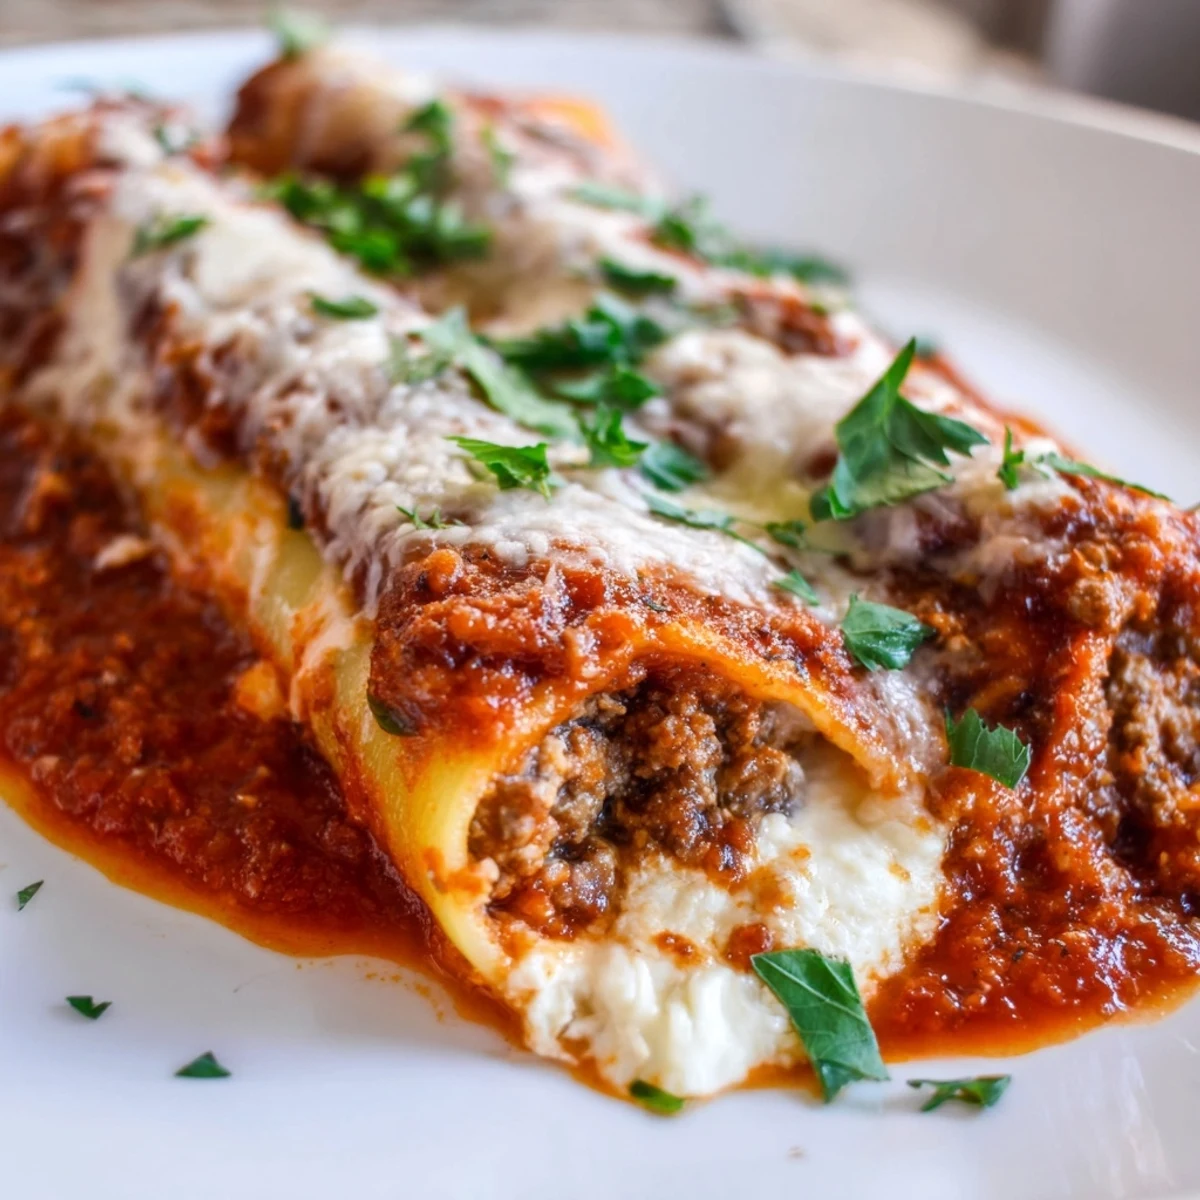
Save This classic Italian dish features delicate pasta tubes stuffed with a luxurious blend of ricotta, mozzarella, and Parmesan cheeses, enhanced with fresh parsley and a hint of nutmeg. The filled manicotti are nestled in a robust homemade meat sauce, crafted with ground beef, aromatic onions and garlic, and simmered tomatoes seasoned with basil and oregano.
After baking until the cheese turns golden and bubbly, the result is a deeply satisfying meal that brings the warmth of traditional Italian cooking to your table. Perfect for family dinners or special occasions when you crave something truly comforting.
The first time I made manicotti, I ended up with cheese filling smeared across my forehead and somehow on the kitchen ceiling. My grandmother watched from her chair, cackling as I tried to wrestle those slippery pasta tubes with nothing but determination and a soup spoon. Now I use a zip-top bag with the corner snipped off, a trick she finally shared after watching me struggle through three broken shells. That Sunday afternoon taught me that the best recipes often come with their own messy origin stories.
Last winter, my neighbor Sarah came over during a snowstorm with nothing but a bottle of red wine and an appetite. We stood over the stove, tasting the sauce until the wine bottle was empty and the pasta was perfectly al dente. She still texts me every time she makes it, claiming her family now requests it for every birthday and holiday dinner. Some recipes just have that effect on people.
Ingredients
- Olive oil: Creates the foundation for sautéing your aromatics, though butter works in a pinch for a richer start
- Medium onion: Finely chopped so it virtually disappears into the sauce, leaving only sweetness behind
- Garlic cloves: Minced fresh, never the pre chopped stuff from a jar which can taste metallic
- Ground beef: The backbone of your sauce, though Italian sausage kicks up the authentic factor if you are feeling indulgent
- Crushed tomatoes: Look for San Marzano on the can, they are worth the extra dollar
- Tomato sauce: Adds body without the texture of crushed tomatoes
- Tomato paste: Concentrates the tomato flavor and helps thicken everything beautifully
- Dried basil and oregano: The classic Italian duo, though fresh basil added at the end brings brightness
- Red pepper flakes: Even if you think you do not like heat, this tiny amount creates depth without burn
- Sugar: Just enough to tame the acidity of canned tomatoes, a trick my nonna swore by
- Ricotta cheese: Whole milk ricotta makes a noticeable difference in creaminess
- Mozzarella cheese: Shred it yourself if you have the patience, pre shredded has anti caking agents that affect melting
- Parmesan cheese: The real stuff, not the green shaker can, please
- Egg: Binds the filling together so it does not turn into a melty mess in the oven
- Fresh parsley: Adds color and a fresh note to cut through all that rich cheese
- Ground nutmeg: The secret ingredient that makes the filling taste professionally balanced
- Manicotti shells: Cooking them slightly under al dente is crucial since they finish in the oven
- Extra mozzarella and Parmesan: Because the top layer deserves its own moment of golden glory
Instructions
- Get your oven ready:
- Preheat to 375°F and grease a 9x13 baking dish with a little olive oil or cooking spray, paying attention to the corners
- Build your sauce foundation:
- Heat olive oil in a large skillet over medium heat, sauté the onion until it turns translucent and smells sweet, about 4 minutes, then add garlic for just 60 seconds so it does not burn
- Brown the beef:
- Add ground beef and break it apart with a wooden spoon, cooking until no pink remains, then drain most of the fat but leave about a tablespoon for flavor
- Simmer into sauce:
- Pour in both cans of tomato products plus the paste, add all your herbs and spices, then let it bubble gently uncovered for 15 to 20 minutes while you stir occasionally
- Cook the pasta smart:
- Boil manicotti for 2 minutes less than the package says, drain and immediately rinse with cold water so they stop cooking and become cool enough to handle
- Make the filling:
- Mix ricotta, mozzarella, Parmesan, egg, parsley, nutmeg, salt and pepper in a bowl until completely combined
- Fill the shells:
- Spoon cheese mixture into a zip-top bag, snip one corner, and pipe filling into both ends of each manicotti tube
- Layer it up:
- Spread one cup of sauce on the baking dish bottom, arrange filled manicotti in a single layer, cover with remaining sauce
- Top with cheese:
- Sprinkle the extra mozzarella and Parmesan evenly over everything, making sure every shell gets some love
- Bake covered then uncovered:
- Cover with foil and bake 25 minutes, then remove foil and bake 10 to 15 minutes more until cheese is bubbling and golden in spots
- Let it rest:
- Wait 10 minutes before serving, this makes cutting and serving so much easier
 Save
Save My daughter declared this her birthday dinner request three years running now, and honestly, I do not mind making it at all. There is something deeply satisfying about watching the family gather around the table as that golden cheese comes out of the oven. Food is never just about eating, is it?
Make Ahead Magic
You can assemble everything up to 24 hours in advance, cover tightly with foil, and refrigerate until you are ready to bake. Add about 10 minutes to the covered baking time since it will be cold. The flavors actually meld beautifully overnight, making it even better for meal prep or busy weeknight dinners.
Freezing Instructions
Wrap the assembled dish tightly with plastic and then foil before freezing for up to 3 months. Thaw overnight in the refrigerator before baking, or bake from frozen at 350°F for about 90 minutes, removing the foil for the last 15 minutes. This has saved me more times than I can count when unexpected guests show up.
Serving Suggestions
A crisp green salad with lemon vinaigrette cuts through the richness perfectly, and warm garlic bread is non negotiable in my house. Do not forget the extra Parmesan at the table, some people like to shower their individual serving.
- Open that red wine about 30 minutes before serving to let it breathe
- Keep the foil slightly tented if the cheese is browning too fast
- Leftovers reheat surprisingly well in the microwave with a splash of water
 Save
Save I hope this becomes one of those recipes you make without even thinking, the kind that feels like muscle memory in the best possible way. There is always room for more comfort on the table.
Recipe FAQs
- → Can I make manicotti ahead of time?
-
Yes, you can assemble the entire dish up to 24 hours in advance. Cover tightly and refrigerate, then bake when ready. You may need to add 5-10 minutes to the baking time if baking cold from the refrigerator.
- → What's the easiest way to fill manicotti shells?
-
Using a piping bag or zip-top bag with the corner snipped off is the simplest method. This allows you to neatly pipe the cheese filling directly into the shells without making a mess.
- → Can I freeze leftovers?
-
Absolutely. Portion leftovers into airtight containers and freeze for up to 3 months. Thaw overnight in the refrigerator and reheat in the oven at 350°F until heated through.
- → What can I substitute for ground beef?
-
Ground turkey, chicken, or Italian sausage work beautifully. For a vegetarian version, omit the meat entirely and add sautéed mushrooms, spinach, or bell peppers to the sauce for extra depth.
- → Why is nutmeg added to the cheese filling?
-
A small amount of nutmeg is a traditional Italian addition to cheese fillings. It adds a subtle warmth and complexity that enhances the ricotta without making the dish taste like dessert.
- → How do I prevent manicotti shells from tearing?
-
Cook the shells 1-2 minutes less than the package directs, then rinse immediately with cold water. This stops the cooking process and keeps them firm enough to handle while filling.