 Save
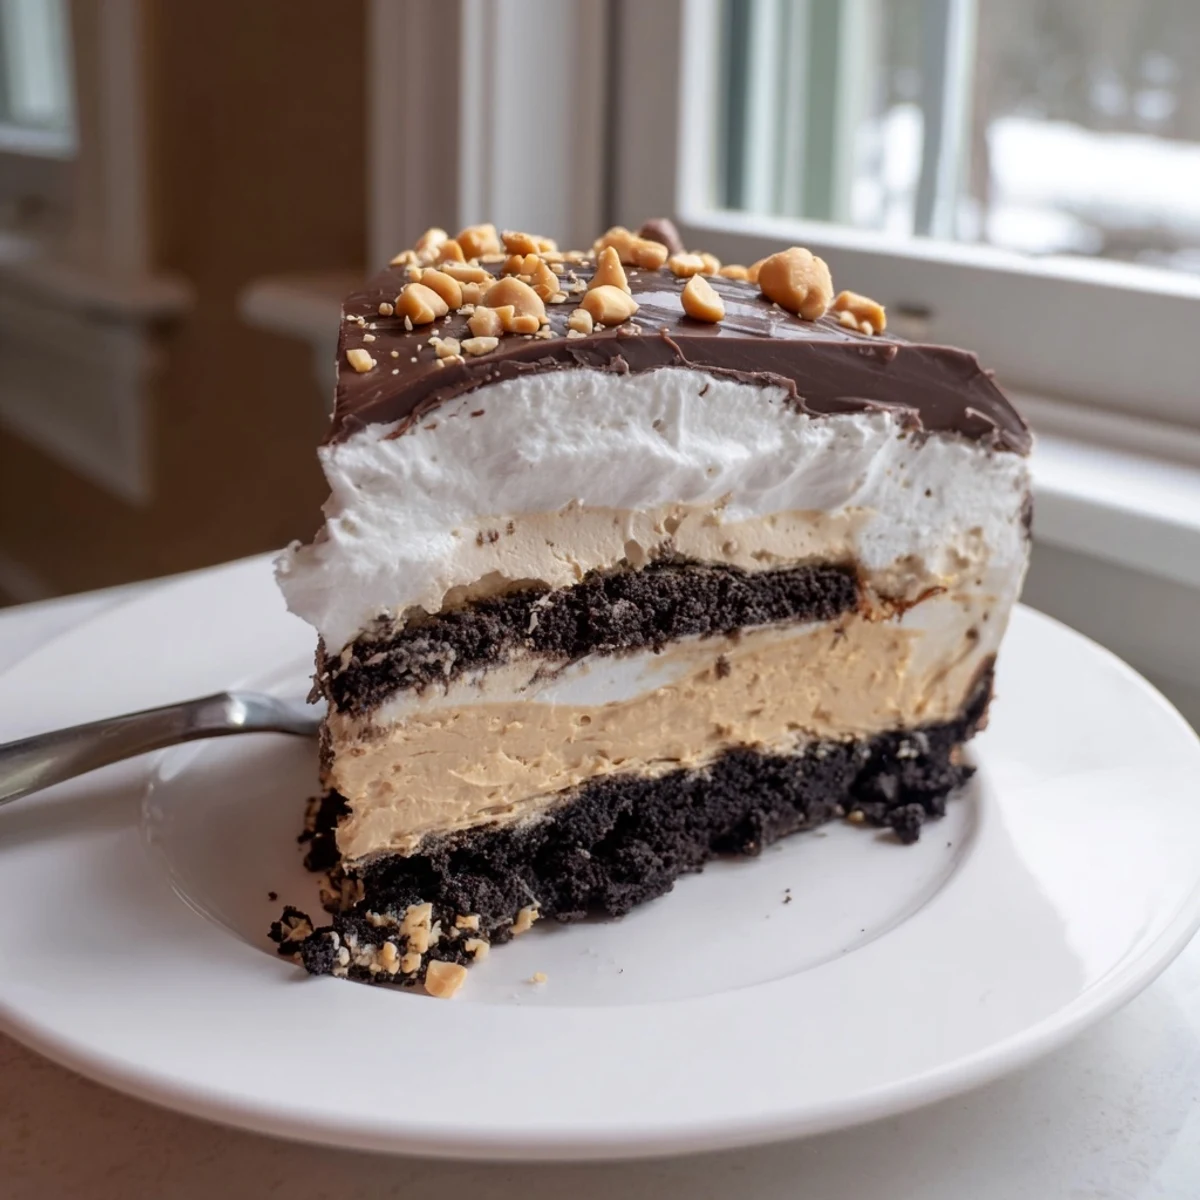
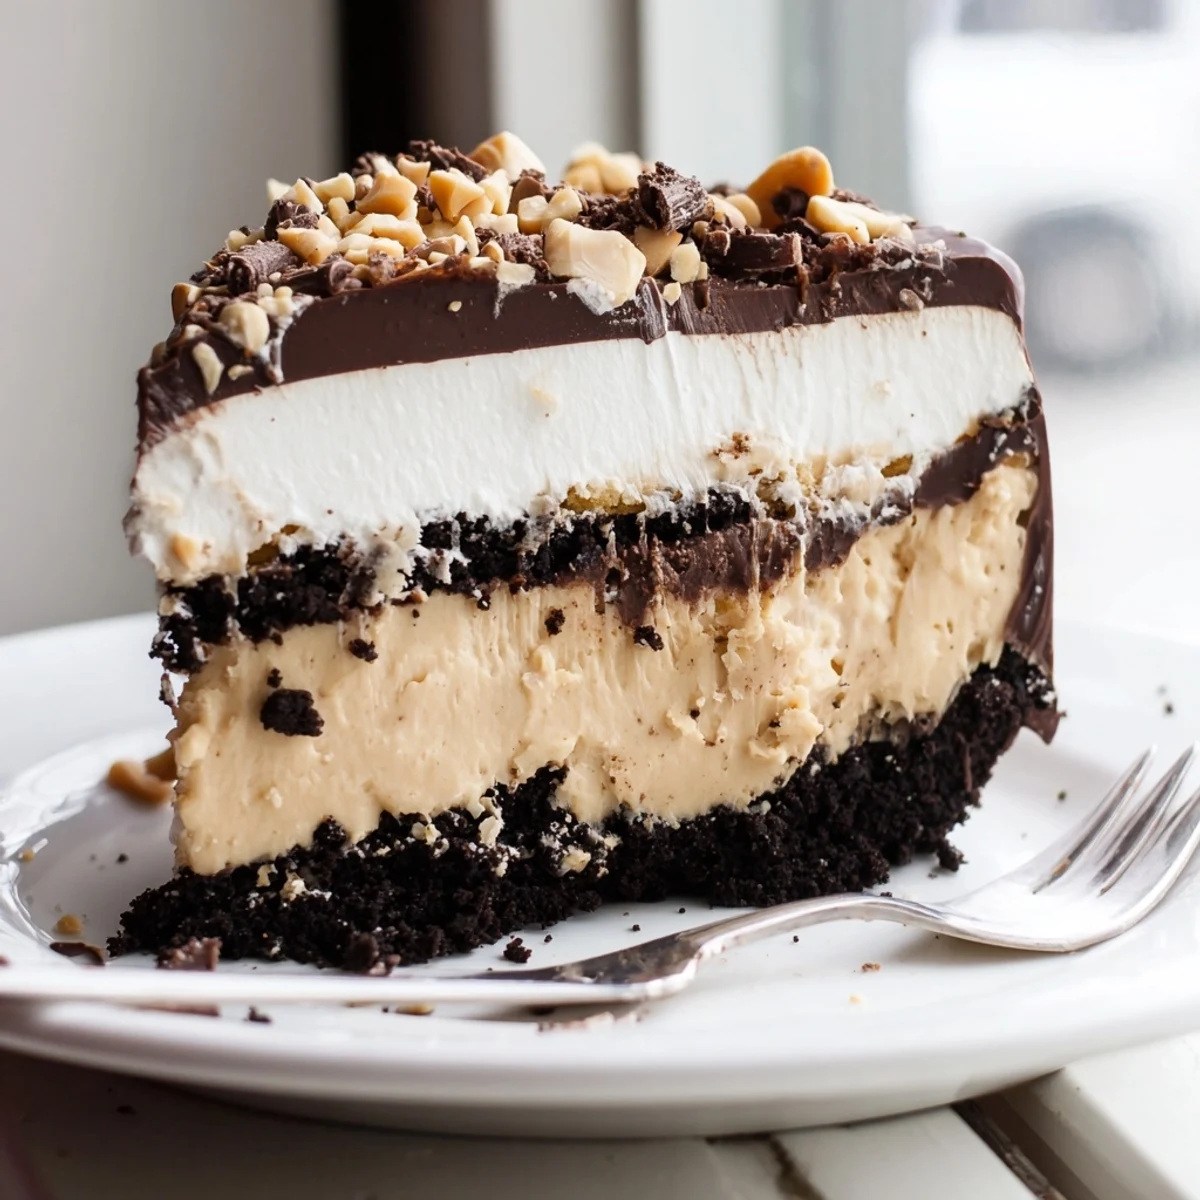
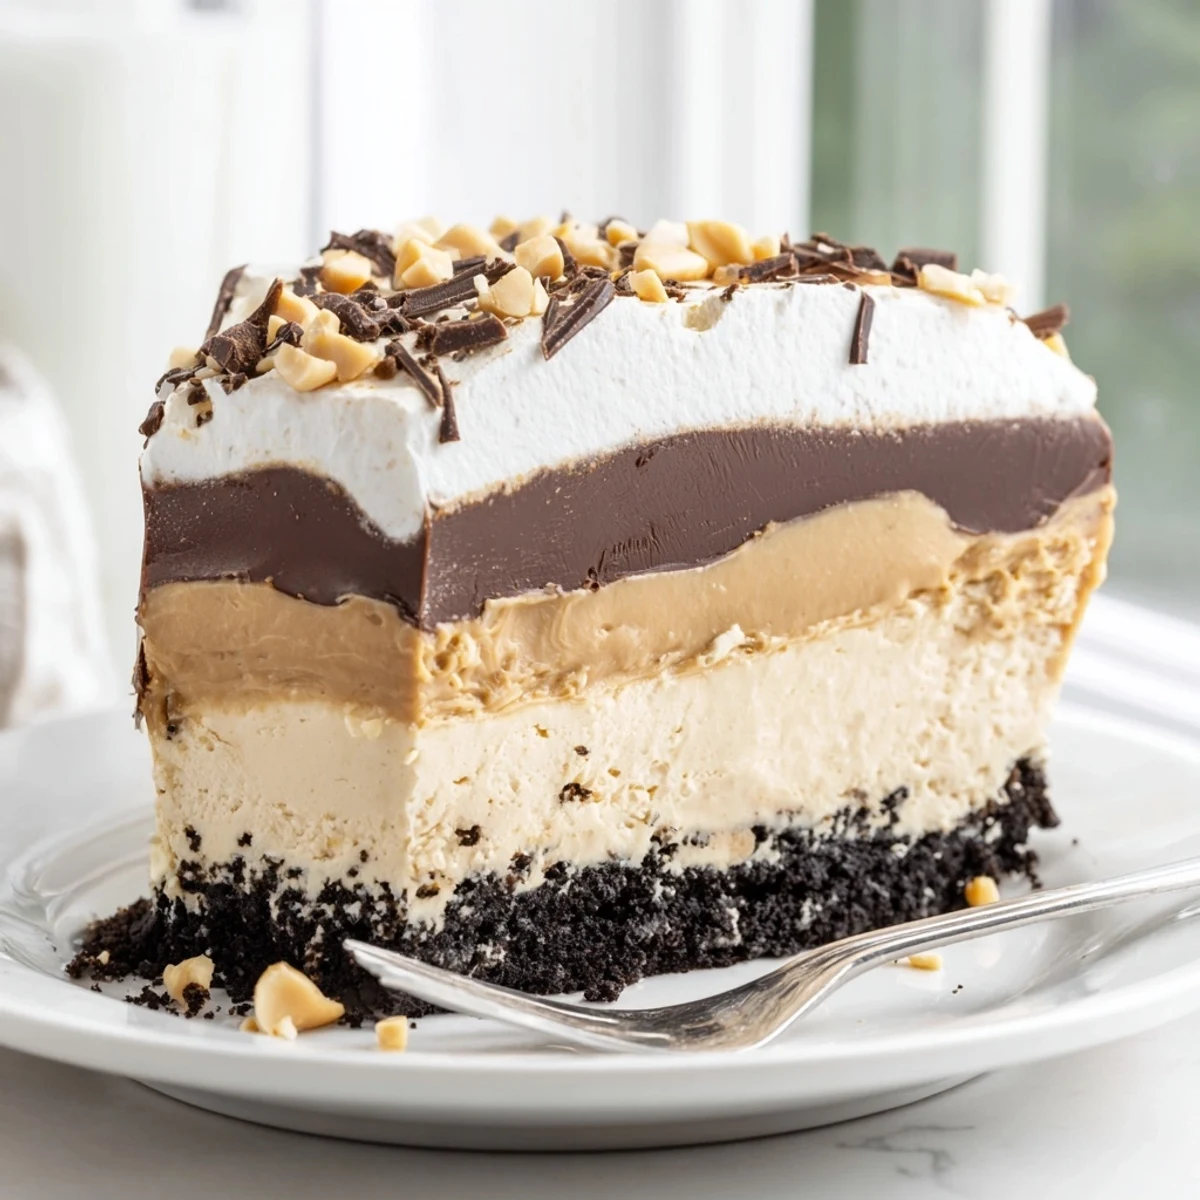
Save This no-bake peanut butter layered delight combines a crunchy chocolate cookie crust with a silky cream cheese and peanut butter filling, topped with a rich chocolate ganache layer and fluffy whipped topping.
Ready in just 25 minutes of prep time, it needs at least 4 hours of chilling before serving. The contrast of textures — from the crisp base to the creamy layers — makes every bite irresistible.
Customize it with different nut butters or gluten-free cookies to suit your preferences.
My kitchen counter was a disaster zone the night I threw this together for a friend's going away party, but nobody cared once they tasted it. The chocolate had smeared across my favorite cookbook and I accidentally used chunky peanut butter instead of creamy, yet that dessert vanished faster than anything I had ever made. Three people texted me the next morning asking for the recipe, and one of them still brings it up at every gathering.
I have made this for office potlucks, holiday dinners, and one memorable Tuesday when I simply needed something sweet. Each time I serve it, someone new pulls me aside to tell me it is the best dessert they have eaten in years. There is something about those stacked layers that makes people feel like you spent all day on it, even though the active work is barely twenty minutes.
Ingredients
- Chocolate sandwich cookies (200 g): The darker, more intensely flavored cookies create a base that balances the sweet layers above.
- Unsalted butter (60 g), melted: Acts as the glue holding your crust together, so do not skimp here.
- Cream cheese (250 g), softened: Let it sit out for at least thirty minutes because cold cream cheese will leave you with lumpy batter.
- Creamy peanut butter (180 g): Stick with a standard commercial brand since natural varieties can separate and make the layer greasy.
- Powdered sugar (100 g): Sweetens the filling without any grainy texture.
- Whipped topping (150 ml plus 200 ml), thawed: Divided between the peanut butter layer and the final topping, it keeps everything light and airy.
- Semisweet chocolate chips (120 g): Creates a glossy shell that snaps slightly when you cut into it.
- Heavy cream (80 ml): Combined with the chocolate to form a ganache that pours like silk.
- Chopped roasted peanuts (30 g): Optional, but they add a wonderful saltiness and crunch on top.
Instructions
- Build the cookie crust:
- Toss the crushed cookies with melted butter until every crumb glistens, then press the mixture firmly and evenly into the bottom of your pan. Pop it into the freezer for fifteen minutes so it firms up while you work on the next layer.
- Whip up the peanut butter filling:
- Beat the softened cream cheese, peanut butter, and powdered sugar together until completely smooth and lump free. Gently fold in the whipped topping with a spatula, being careful not to deflate it, then spread this clouds of filling over your chilled crust.
- Pour on the chocolate ganache:
- Microwave the chocolate chips and heavy cream in short twenty second bursts, stirring between each one, until you have a smooth and shiny ganache. Let it cool just slightly so it does not melt the peanut butter layer, then pour and spread it evenly across the top.
- Chill everything thoroughly:
- Cover the pan and tuck it into the refrigerator for at least four hours, though overnight is even better if you can wait that long. The layers need this time to set properly so they slice cleanly instead of sliding apart.
- Finish and serve:
- Spread the remaining whipped topping over the set chocolate layer and scatter chopped peanuts or chocolate shavings across the surface. Slice with a warm knife for the cleanest cuts, and serve it well chilled.
 Save
Save The going away party where I first served this turned into an impromptu dessert competition I never signed up for, and this layered delight won without contest. My friend who was leaving asked if I would make it again for her welcome home dinner, and that request told me everything I needed to know about how special this dessert truly is.
Making It Your Own
Swapping in almond butter or cashew butter changes the flavor profile beautifully while keeping the same creamy texture. I have also tossed chopped pretzels into the cookie base for a salty twist that had everyone at the table reaching for seconds. For anyone with gluten sensitivities, gluten free chocolate cookies work perfectly as a substitute.
Serving Suggestions
Cold milk is the obvious pairing, but a glass of dessert wine alongside a small slice turns this into something surprisingly elegant. I served it once with strong black coffee at a book club meeting, and the bitter contrast made every bite of the sweet layers taste even better.
Storage and Make Ahead
This dessert keeps beautifully in the refrigerator for up to four days when wrapped tightly, making it ideal for preparing ahead of stressful events. The cookie crust softens slightly over time but honestly nobody has ever complained about that in my experience.
- Cover the surface directly with plastic wrap to prevent the whipped topping from absorbing refrigerator odors.
- Freeze individual slices wrapped in parchment for up to one month if you want a secret stash of instant happiness.
- Always let frozen slices thaw in the fridge overnight rather than at room temperature for the best texture.
 Save
Save Some recipes earn a permanent spot in your rotation because they ask so little and give so much back. This layered delight is exactly that kind of reliable crowd pleaser, and once you make it, you will understand why people keep asking for it again and again.
Recipe FAQs
- → Can I make this dessert ahead of time?
-
Yes, this dessert actually benefits from being made ahead. You can prepare it up to 24 hours in advance and keep it covered in the refrigerator. The layers set beautifully overnight, making it perfect for gatherings.
- → What can I substitute for whipped topping?
-
You can use freshly whipped heavy cream sweetened with a little powdered sugar and vanilla extract as a natural alternative. Stabilize it with a teaspoon of gelatin if you want it to hold up longer in the refrigerator.
- → How do I get clean slices when serving?
-
Use a sharp knife dipped in hot water and wiped dry between each cut. Keeping the dessert well-chilled also helps maintain clean edges. For the neatest results, freeze for 30 minutes before slicing.
- → Can I use natural peanut butter instead of creamy?
-
Regular creamy peanut butter works best for a smooth, stable layer. Natural peanut butter tends to separate and can make the filling oily. If using natural, stir it very thoroughly and consider adding an extra tablespoon of powdered sugar to help bind it.
- → How should I store leftovers?
-
Cover the pan tightly with plastic wrap or transfer slices to an airtight container. Store in the refrigerator for up to 4 days. You can also freeze individual slices wrapped tightly for up to 1 month — thaw in the refrigerator before serving.
- → Can I use a different pan size?
-
A 23 cm (9-inch) springform pan or square baking dish works best for the layer proportions given. You can use a slightly larger pan, but the layers will be thinner. Avoid smaller pans as the dessert will be too tall to slice neatly.