 Save
Save Transform your sourdough discard into elegant breakfast pastries with this simple yet impressive technique. The dough comes together quickly with chilled butter, flour, and your unfed starter, creating a tender, flaky base that's naturally tangy.
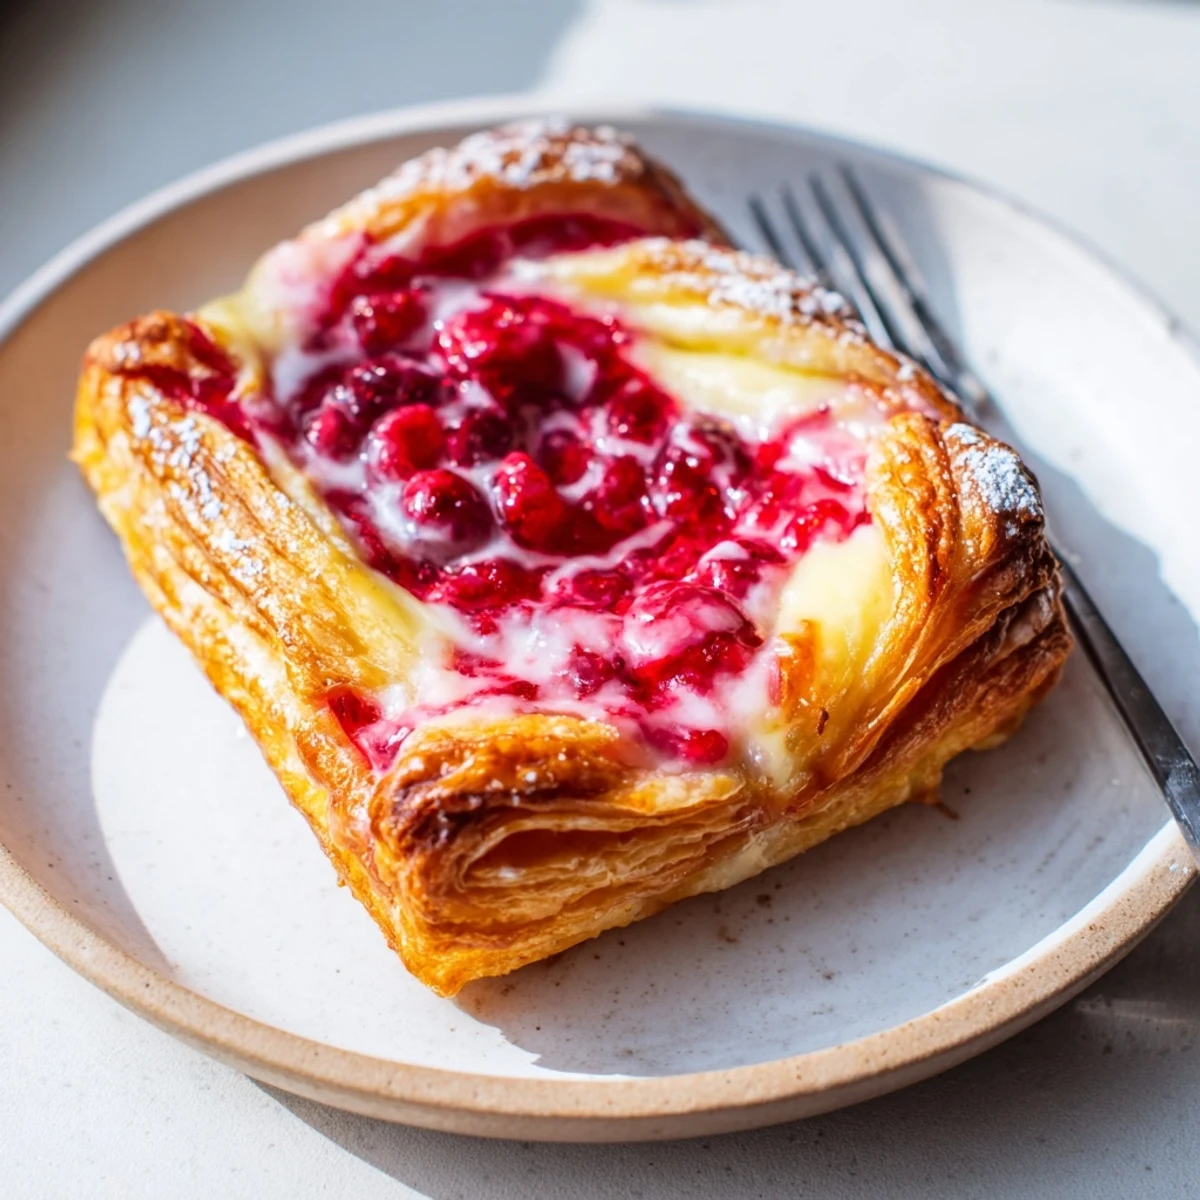
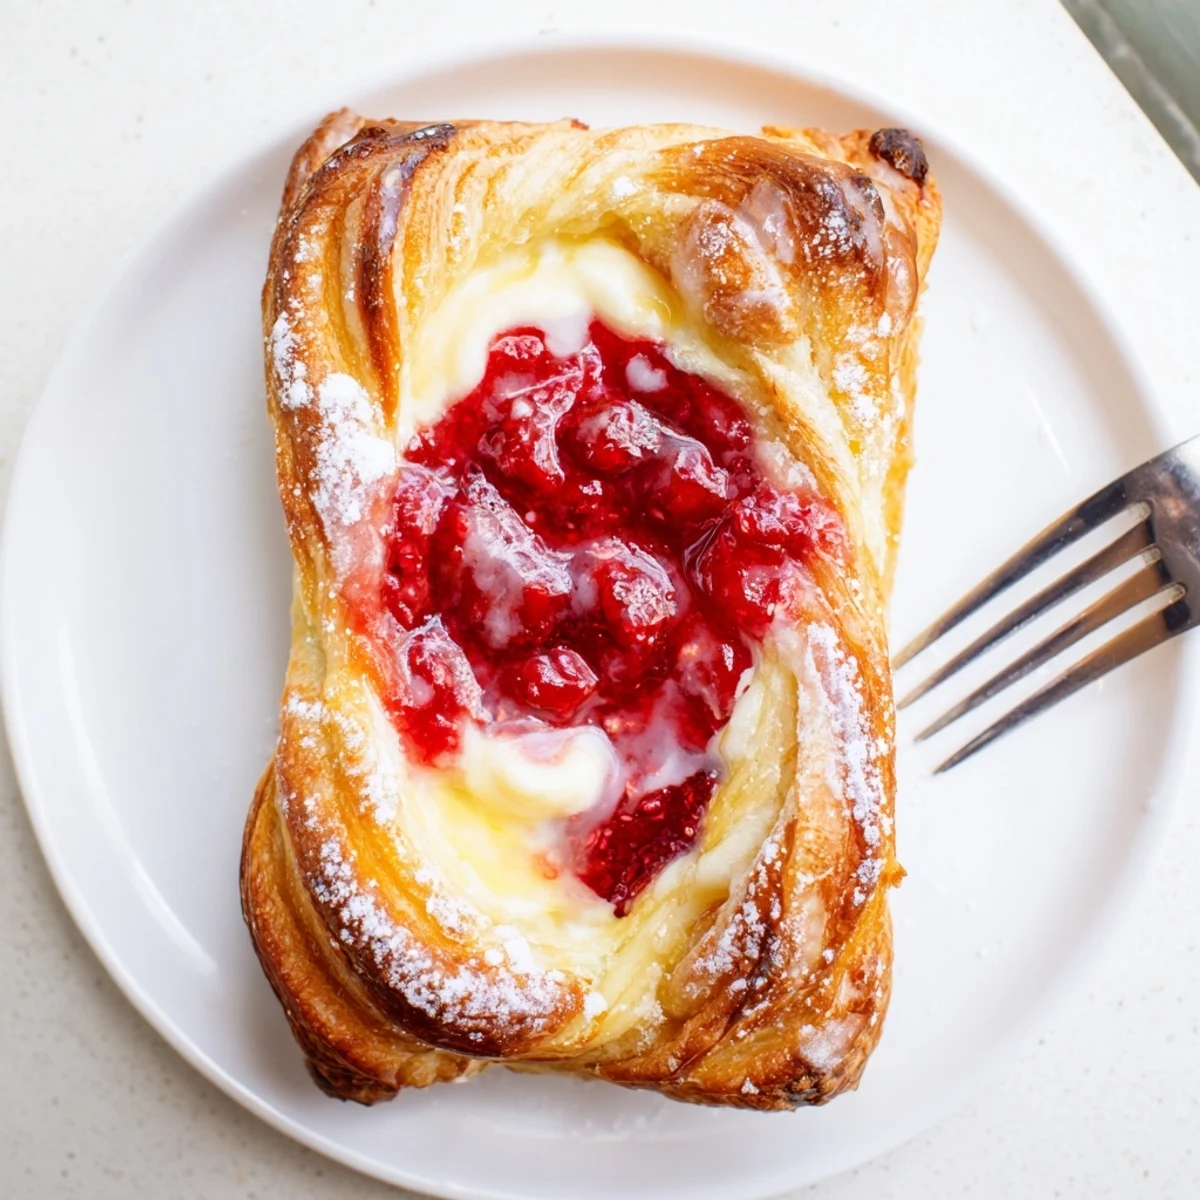
The star of the show is the dual filling—rich, velvety cream cheese sweetened with vanilla pairs beautifully with a homemade raspberry reduction that's thickened just enough to hold its shape during baking. A quick vanilla glaze adds the perfect finishing touch.
These pastries require about an hour of chilling time for the dough to become workable, plus a brief proofing period that helps them puff beautifully in the oven. The result is bakery-worthy Danishes with a characteristic golden exterior and tender, buttery layers.
Last Saturday morning, I stared at my jar of sourdough discard knowing there had to be something better than simply composting it. That impulse led to these danishes, and honestly, my whole family hovered around the oven watching them turn golden. The kitchen filled with this incredible buttery aroma that made waiting for them to cool almost impossible.
My youngest daughter walked in while I was assembling them, hands already reaching, and I had to promise her first dibs just to keep the raspberry filling safe. That moment of anticipation might be my favorite part of baking now. She still asks for these every weekend, and the way she lights up when she sees the dough chilling is worth every minute.
Ingredients
- Unsalted butter: Keep it ice cold and cut into small cubes before you start working it into the flour. Cold butter creates those flaky layers that make a pastry truly special.
- All purpose flour: Spoon and level your flour instead of scooping directly from the bag to avoid packing too much into your measuring cup.
- Sourdough discard: Use unfed starter straight from your refrigerator. The fermentation adds incredible depth and keeps the dough tender.
- Cream cheese: Let it soften completely at room temperature. This tiny detail saves you from lumpy filling and makes everything come together smoothly.
- Fresh raspberries: Frozen work beautifully too, just thaw them first and drain any excess liquid so your filling does not become watery.
- Powdered sugar: Whisk the glaze until completely smooth before drizzling. Any lumps will show up on your beautiful finished danishes.
Instructions
- Prepare the pastry dough:
- Cut cold butter into the flour using a pastry blender or your fingertips until you see coarse, pebble sized crumbs throughout. Mix in the sourdough discard, sugar, and salt until the dough just starts to come together. Form it into a disk, wrap tightly in plastic, and let it rest in the refrigerator for at least one hour.
- Whip up the cream cheese filling:
- Beat the softened cream cheese until completely smooth and creamy. Add the sugar, vanilla, and lemon juice, then mix until no streaks remain and everything is silky and uniform.
- Cook the raspberry filling:
- Combine the raspberries, sugar, cornstarch, and lemon juice in a small saucepan over medium heat. Stir constantly for three to five minutes until the mixture bubbles and thickens beautifully. Let it cool completely before using.
- Roll and cut the dough:
- Preheat your oven to 375 degrees and line a baking sheet with parchment paper. On a lightly floured surface, roll the chilled dough to about one quarter inch thickness. Cut it into eight rectangles or circles and arrange them two inches apart on your prepared baking sheet.
- Fill and shape the danishes:
- Press your thumb or the back of a spoon into the center of each piece to create a well. Spoon about one tablespoon of cream cheese filling into each indentation, then top with a spoonful of the cooled raspberry mixture.
- Proof and brush:
- Let the pastries rest at room temperature for twenty to thirty minutes until they puff slightly. Brush just the edges with beaten egg for that gorgeous golden shine in the oven.
- Bake to perfection:
- Bake for twenty to twenty five minutes until the edges are deeply golden and the filling is bubbling gently. Cool them on the baking sheet for five minutes before transferring to a wire rack.
- Drizzle with glaze:
- Whisk the powdered sugar, milk, and vanilla until completely smooth. Drizzle over the cooled danishes and let the glaze set for a few minutes before serving.
 Save
Save My neighbor smelled these baking through our open kitchen window and actually knocked on the door to investigate. We ended up eating them warm from the oven on the porch while trading stories about failed baking experiments. Those spontaneous moments are exactly why I love having homemade pastry dough ready in my fridge.
Making Ahead
You can prepare both fillings up to two days in advance and store them in airtight containers in the refrigerator. The dough keeps beautifully for three days, or freeze it for up to a month and thaw it overnight in the fridge before rolling. Bake them fresh in the morning and your house will smell like a European bakery.
Fruit Variations
Blueberries work wonderfully here and need even less cornstarch since they naturally thicken up so nicely when cooked. Strawberries add a lovely sweetness but I recommend slicing them first so you do not get huge chunks. Peaches in summer make an incredibly juicy version that feels entirely special and seasonal.
Storage Tips
These taste best the same day but can be stored in an airtight container for up to two days. Refresh them in a 350 degree oven for five minutes to bring back that freshly baked texture. The glaze does get sticky in humidity, so add it right before serving if you are planning to transport them.
- Place a piece of parchment paper between stacked danishes so they do not stick together
- Freeze unglazed danishes for up to three months and reheat from frozen at 375 degrees for ten minutes
- The glaze can be made ahead and stored in the refrigerator, then whisked with a tiny splash of milk to loosen it back up
 Save
Save There is something deeply satisfying about turning what would have been waste into something this beautiful and delicious. Every time I pull these from the oven, I remember that the best recipes often come from simply being curious in the kitchen.
Recipe FAQs
- → Can I use frozen raspberries instead of fresh?
-
Absolutely. Frozen raspberries work perfectly for the filling—just cook them a minute or two longer to ensure excess moisture evaporates. The cornstarch helps thicken the juices regardless of whether you start with fresh or frozen fruit.
- → What if I don't have sourdough discard?
-
You can substitute equal parts active sourdough starter, though the flavor will be more assertive. Alternatively, use 1/4 cup more flour mixed with 2 tablespoons buttermilk or plain yogurt to approximate the tang and texture.
- → How should I store these pastries?
-
Keep them in an airtight container at room temperature for up to 2 days. For longer storage, freeze unglazed pastries in a freezer bag for up to 3 months. Reheat in a 350°F oven for 5-7 minutes to refresh the texture before glazing.
- → Can I make the dough ahead of time?
-
Yes. The dough can be prepared and chilled for up to 24 hours before rolling and filling. You can also freeze the dough disk for up to 3 months—thaw overnight in the refrigerator before proceeding with assembly.
- → Why do the pastries need to rest before baking?
-
The 20-30 minute rest period allows the chilled dough to come to room temperature slightly, which helps the butter layers expand properly in the oven. This creates those desirable flaky layers and ensures even baking throughout.
- → What other fruit fillings work well?
-
Blueberries, strawberries, blackberries, or even sliced stone fruits like peaches all work beautifully. Just adjust the sugar based on the fruit's natural sweetness, and keep the cornstarch ratio consistent for proper thickening.