 Save
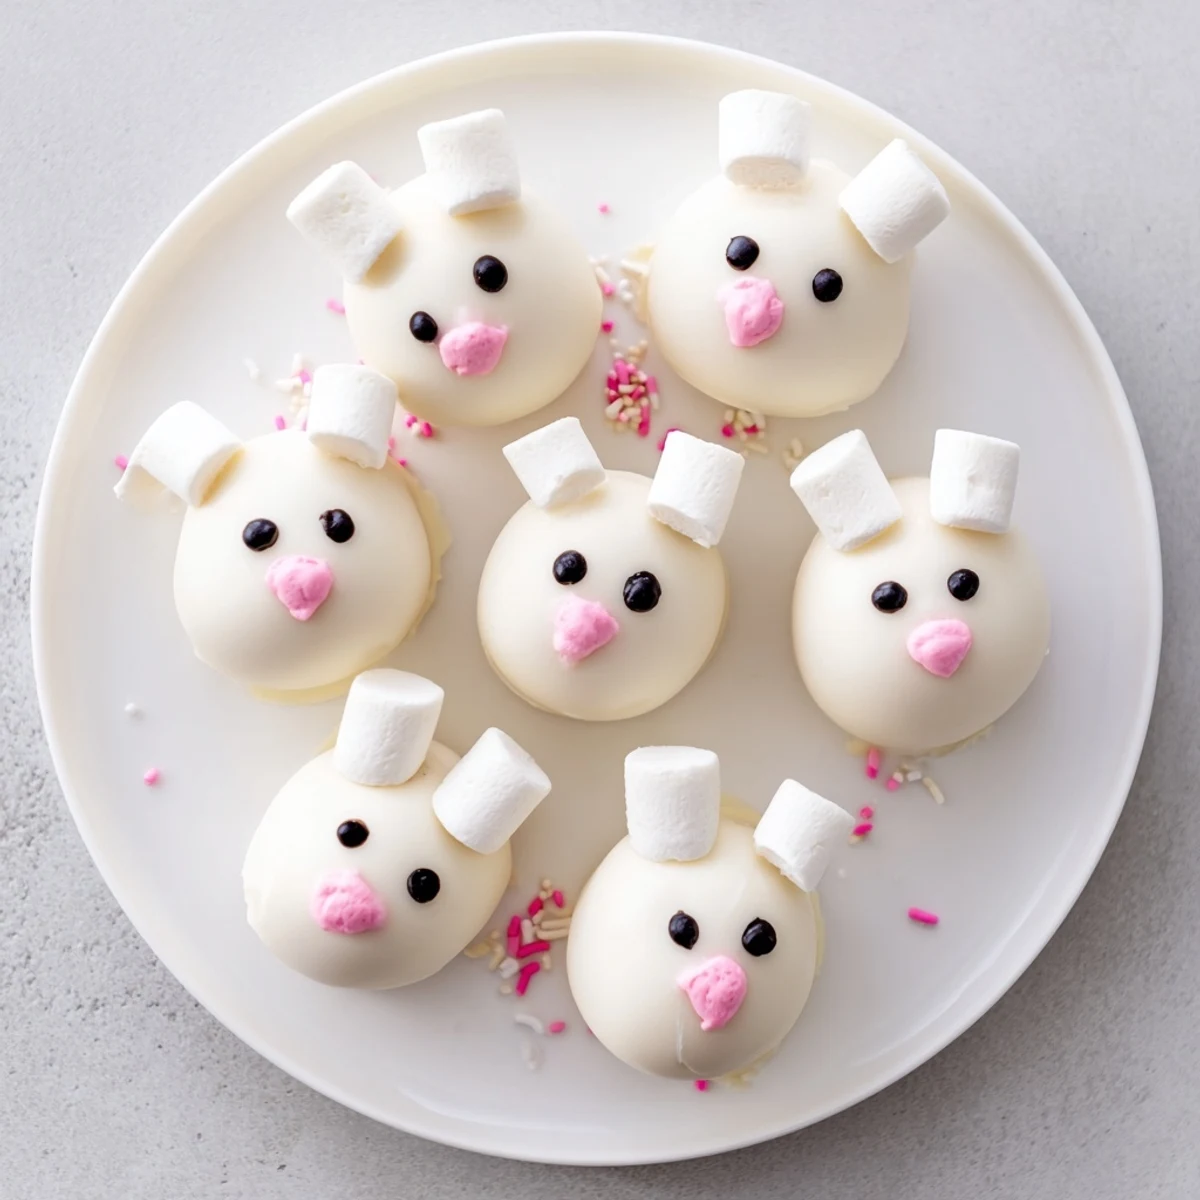
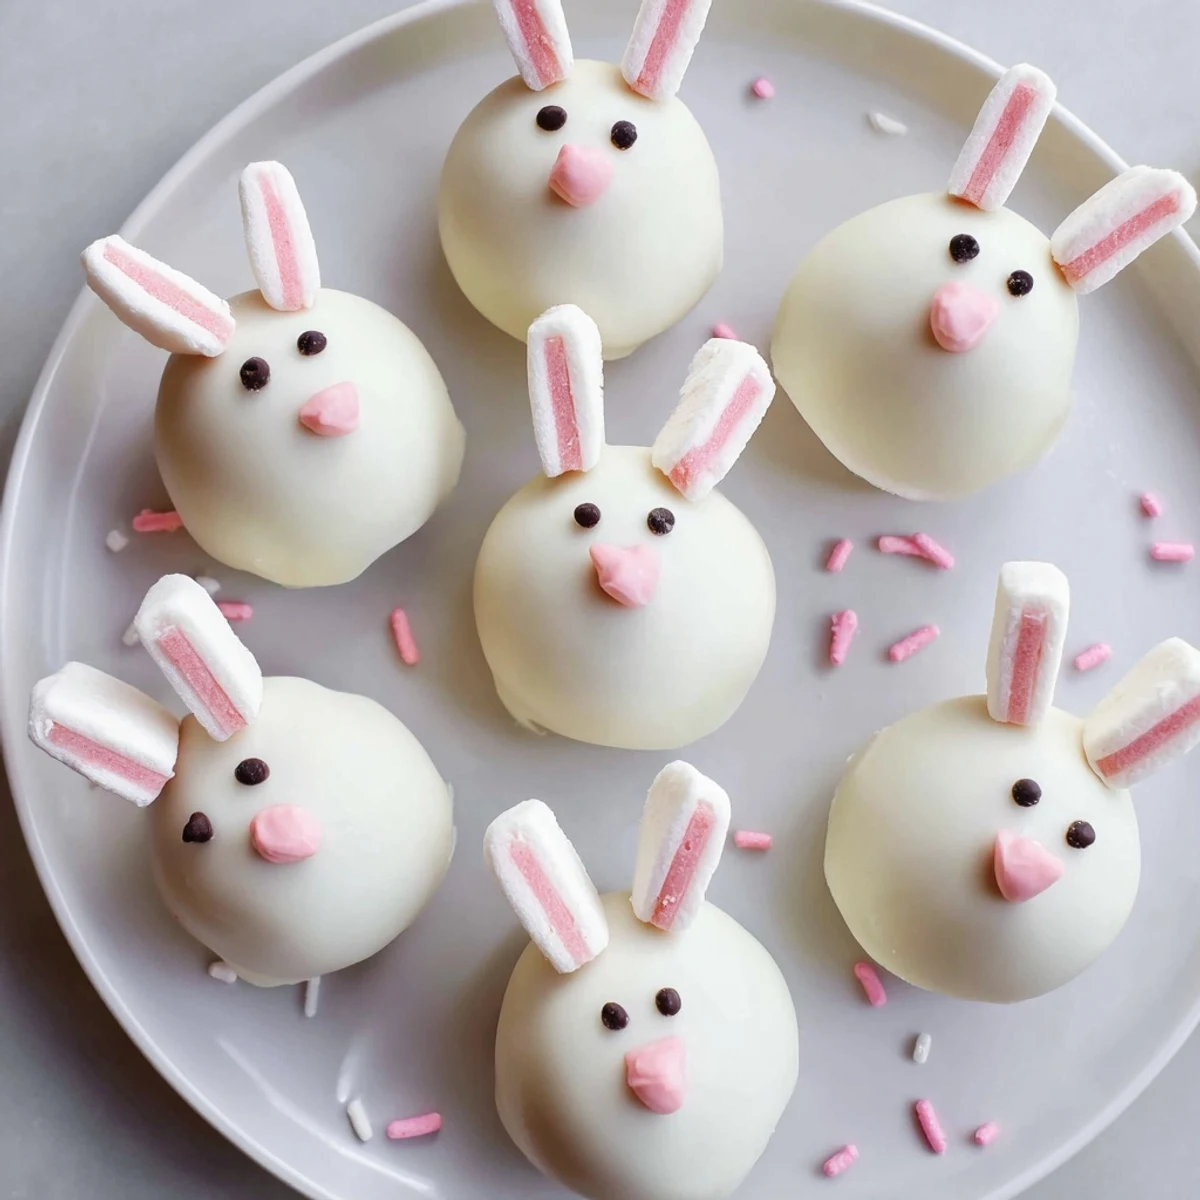
Save These delightful bunny-shaped treats combine crushed Oreo cookies with cream cheese to create a smooth, truffle-like filling. Each piece gets coated in white chocolate and decorated with marshmallow ears and tails, plus pink candy details for the nose and inner ears. The process involves freezing the shaped balls briefly before dipping to help the coating set properly. A simple toothpick technique adds the finishing touches with pink coloring and black eyes. Keep them chilled until serving for the best texture and appearance.
Last spring my youngest discovered my stash of Oreo balls and declared they needed to be bunnies. I laughed until she started cutting marshmallows into tiny ear shapes with such serious dedication that I grabbed a knife and joined her at the counter. The kitchen ended up covered in powdered sugar and chocolate fingerprints, but those first lopsided bunny faces were worth every sticky surface.
My neighbor came over during bunny decorating year and what started as quick hello turned into two hours at my kitchen table. She ended up taking home a container of slightly wonky bunnies and sent me photos of her husband posing each one with different expressions.
Ingredients
- Oreo cookies: Regular not Double Stuf because you need that cookie to cream cheese ratio to hold the bunny shape without collapsing
- Cream cheese: Must be fully softened or you will get frustrated trying to blend it into those fine crumbs
- White chocolate or candy melts: Candy melts set up faster and give you that smooth porcelain finish but white chocolate tastes infinitely better
- Mini marshmallows: These transform into ears and tails with nothing more than a sharp knife and steady hands
- Pink candy melts or food coloring: A tiny toothpick dipped in pink brings those bunny faces to life in seconds
Instructions
- Pulse the cookies into crumbs:
- Process those Oreos until they are absolutely fine because big cookie chunks will make your bunny heads lumpy and bumpy
- Blend in the cream cheese:
- Mix until the dough comes together in a smooth ball that holds its shape when you squeeze it
- Shape your bunny heads:
- Roll tablespoon portions into balls then gently elongate them into slight ovals for that authentic bunny silhouette
- Prep your marshmallow parts:
- Cut marshmallows in half for tails and slice thin slivers for ears keeping them somewhat uniform in size
- Freeze the shapes:
- Thirty minutes in the freezer makes them firm enough to dip without losing their form in warm chocolate
- Melt the coating:
- Heat in thirty second bursts stirring between each until you have silky smooth liquid chocolate
- Dip each bunny:
- Lower the frozen ball into chocolate let excess drip off and place it back on parchment with the tail end facing up
- Add marshmallow features:
- Press two ear slivers and one tail half into the wet chocolate before it sets so they stick without extra glue
- Paint on pink details:
- Use a toothpick to add pink inside the ears and dot on a tiny nose while the white is still slightly tacky
- Draw the eyes:
- Wait until everything is completely set then add two simple dots with your edible marker for that final bunny personality
- Chill before serving:
- Thirty minutes in the fridge lets the chocolate fully set and the flavors meld together
 Save
Save My sister texted me at midnight last Easter asking why her bunny faces were melting off because she had skipped the freezing step. We faceted while she reshaped twenty chocolate covered blobs and now she keeps that frozen tray ritual sacred.
Making These Ahead
You can shape and freeze the undipped bunny heads up to a week in advance. Store them between layers of parchment in a sealed container then just dip and decorate the day before your event.
Getting Kids Involved
The dipping part should probably stay in adult hands but decorating faces is perfect for little helpers. Set out small bowls of sprinkles and let them go wild with the edible markers once the chocolate has fully hardened.
Storage Secrets
These actually taste better after sitting overnight in the fridge. The Oreo filling softens slightly against the crisp chocolate shell creating this creamy texture that makes them impossible to stop eating.
- Layer them between wax paper in an airtight container so the marshmallow tails do not get squished
- Let them sit at room temperature for ten minutes before serving for the best texture
- Make double what you think you need because these vanish faster than you can imagine
 Save
Save Nothing beats pulling out that container of bunny faces and watching everyone light up like they are eight years old again.
Recipe FAQs
- → How long do bunny Oreo balls stay fresh?
-
Store in an airtight container in the refrigerator for up to 5 days. The coating stays firm and the filling remains creamy when chilled.
- → Can I make these ahead of time?
-
Yes, prepare them 1-2 days before your event. Keep refrigerated until serving. The marshmallow decorations hold up well when stored properly.
- → What's the best way to melt the white chocolate?
-
Use a microwave-safe bowl and heat in 30-second intervals, stirring between each. This prevents seizing and ensures a smooth dipping consistency.
- → Can I use different types of chocolate?
-
Absolutely. Dark or milk chocolate work beautifully as coatings. The darker contrast creates a striking look against the white decorations.
- → Why do the balls need freezing before dipping?
-
Freezing firms the filling so it holds its shape during coating. This prevents the balls from sliding off the dipping fork or becoming misshapen.
- → What if I don't have pink candy melts?
-
Pink food coloring mixed with white chocolate works equally well. Alternatively, use colored decorating gel or tinted frosting for the details.